Changing the Slide Size in PowerPoint
*PLEASE NOTE: we do not print from PowerPoint files! If you design your poster in PowerPoint please save your file as a PDF before sending to the Makerspace!*
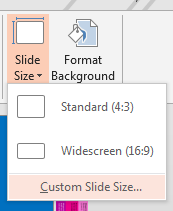
Go to the DESIGN tab. Find the CUSTOMIZE group at the far right end and click SLIDE SIZE

Click on CUSTOM SLIDE SIZE
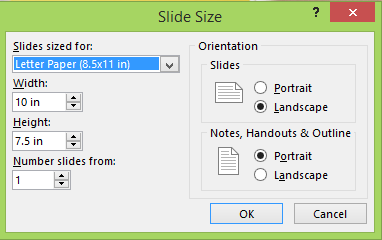
Choose the size you want in the popup box, select from preselected sizes or use the WIDTH and HEIGHT boxes to choose a custom size.
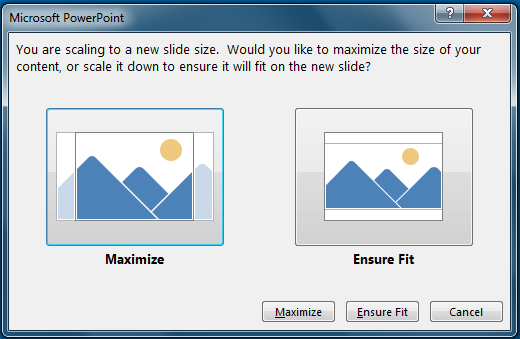
PowerPoint will ask you to either maximize your content or scale it down to ensure best fit. Pick one of the options.
Your PowerPoint is now sized correctly! To save as .pdf go to file > save as > .pdf
Convert Type to Shapes
If you are using a custom font in your poster you will need to convert your text to shapes before sending us the file. This ensures that the fonts open properly when you send them to us.
Adobe Illustrator
- Select your text.
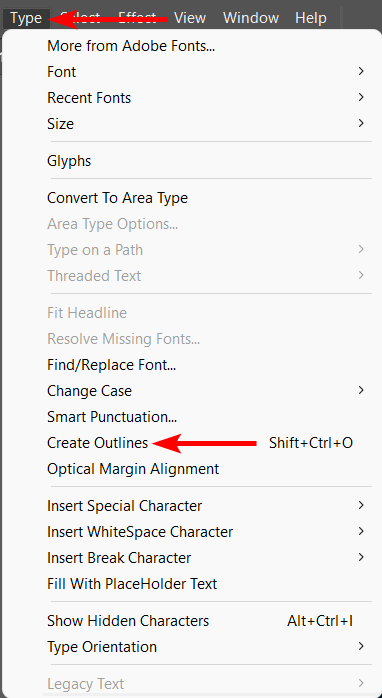
- Go to type > create outlines
- Your text will no longer be editable, but it will show up correctly when you send it over.
PowerPoint
It is a little bit more difficult to do this in PowerPoint, but definitely doable.

- Write your text


- Insert a shape that is larger than your textbox. Right click on it and select send to back.
- Using the shift key, select both the shape and your text.

- Under the Shape Format tab, in the Merge Shapes drop down, select Fragment.
- Delete the shapes you don't need.

- Now your text is shapes.